Let's make another useful basket.
One that you'll make again and again....
The wastepaper basket is a great "use up" basket for any odd piece of dyed reed or seagrass you may have laying around.
Weaving is not particularly hard, it's like anything, practice makes you better with each basket you make. Also there is something really satisfying to looking at a bunch of reeds and like Rumpelstiltskin, creating something wonderful out of something very ordinary. Once you have a sense of how to do it, when the need presents itself for something, you can actually MAKE it rather than BUY it. It is a very liberating and satisfying feeling.
This basket is going to teach you how to weave a round basket. The technique is useful in creating harvest baskets, fruit baskets and especially Easter baskets. Practice it now for Christmas gift baskets later or next year's Easter. Can you imagine presenting your kids with an Easter basket you made and having that handed down to your future grandkids?
 |
| CATS LOVE WEAVING. HELP IS ALWAYS APPRECIATED! |
No matter how many wastebaskets we seem to have it's just never enough. My bedroom trashcan is now located in the dining room. It gets moved around as I clean or when someone needs it. So it's time to make another one.
Materials Needed:
- 1 T pin
- Small rubber/plastic child's ball or eraser(from vending machines, who doesn't have a boatload of these?)
- 2-3 inch round reed
- 1/2" to 5/8" flat reed, cut to 60" and centers marked at 30"
- Any sized reed you may have left over from other projects that will fit around your basket or 1/2-5/8" flat if you want a standard reed
- Water, bucket, scissors or reed cutter, ruler, clamp style clothes pins
- (Optional) bucket for a liner (mine is a recycled ice cream container)
 |
| T pin and eraser |
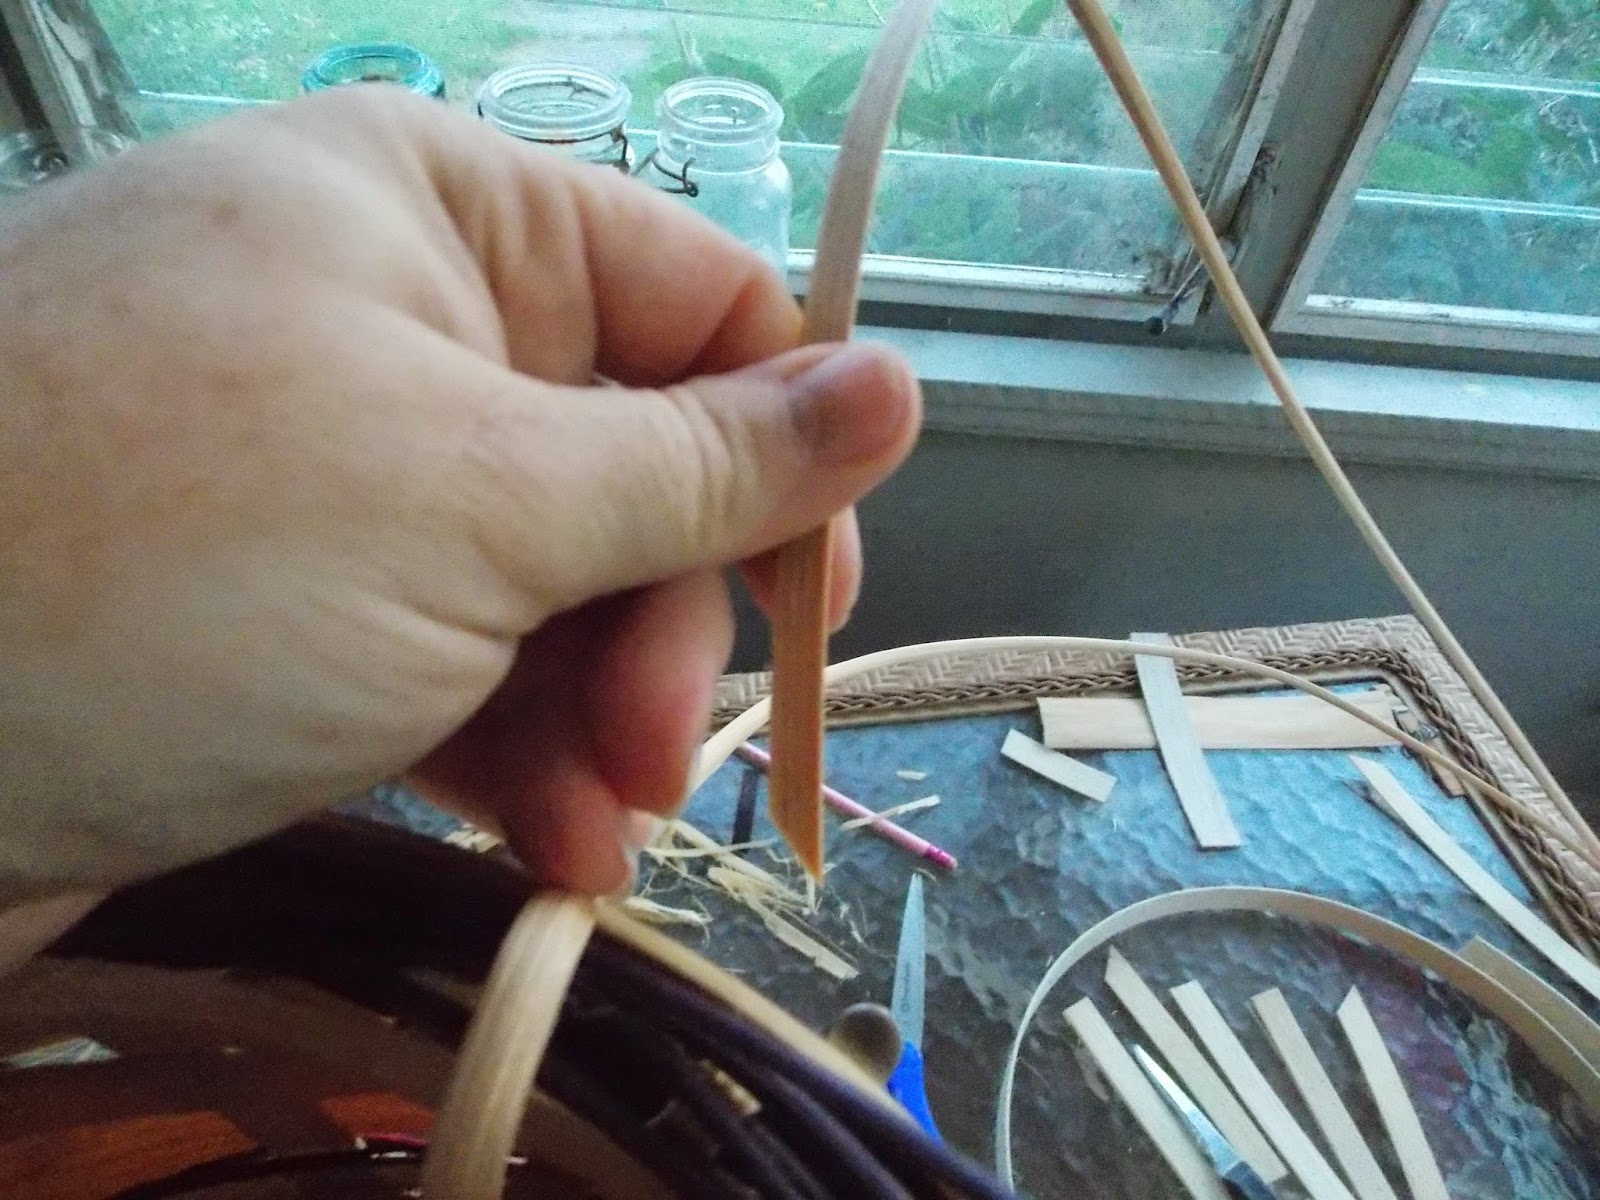
In order to make a round basket, you have to have something to hold those spokes together to weave around. To accomplish this, you need to have this handy little needle that you can purchase at any sewing/craft shop, a "T" pin.

To save your hands/fingers, impale an eraser or cheap rubber/plastic vending machine ball so as not to impale or poke your hand as you weave.
 Remember, reed has a right side and wrong side. To determine, bend the reed and one side will be "hairier" than the other. You will be marking on the "wrong" side.
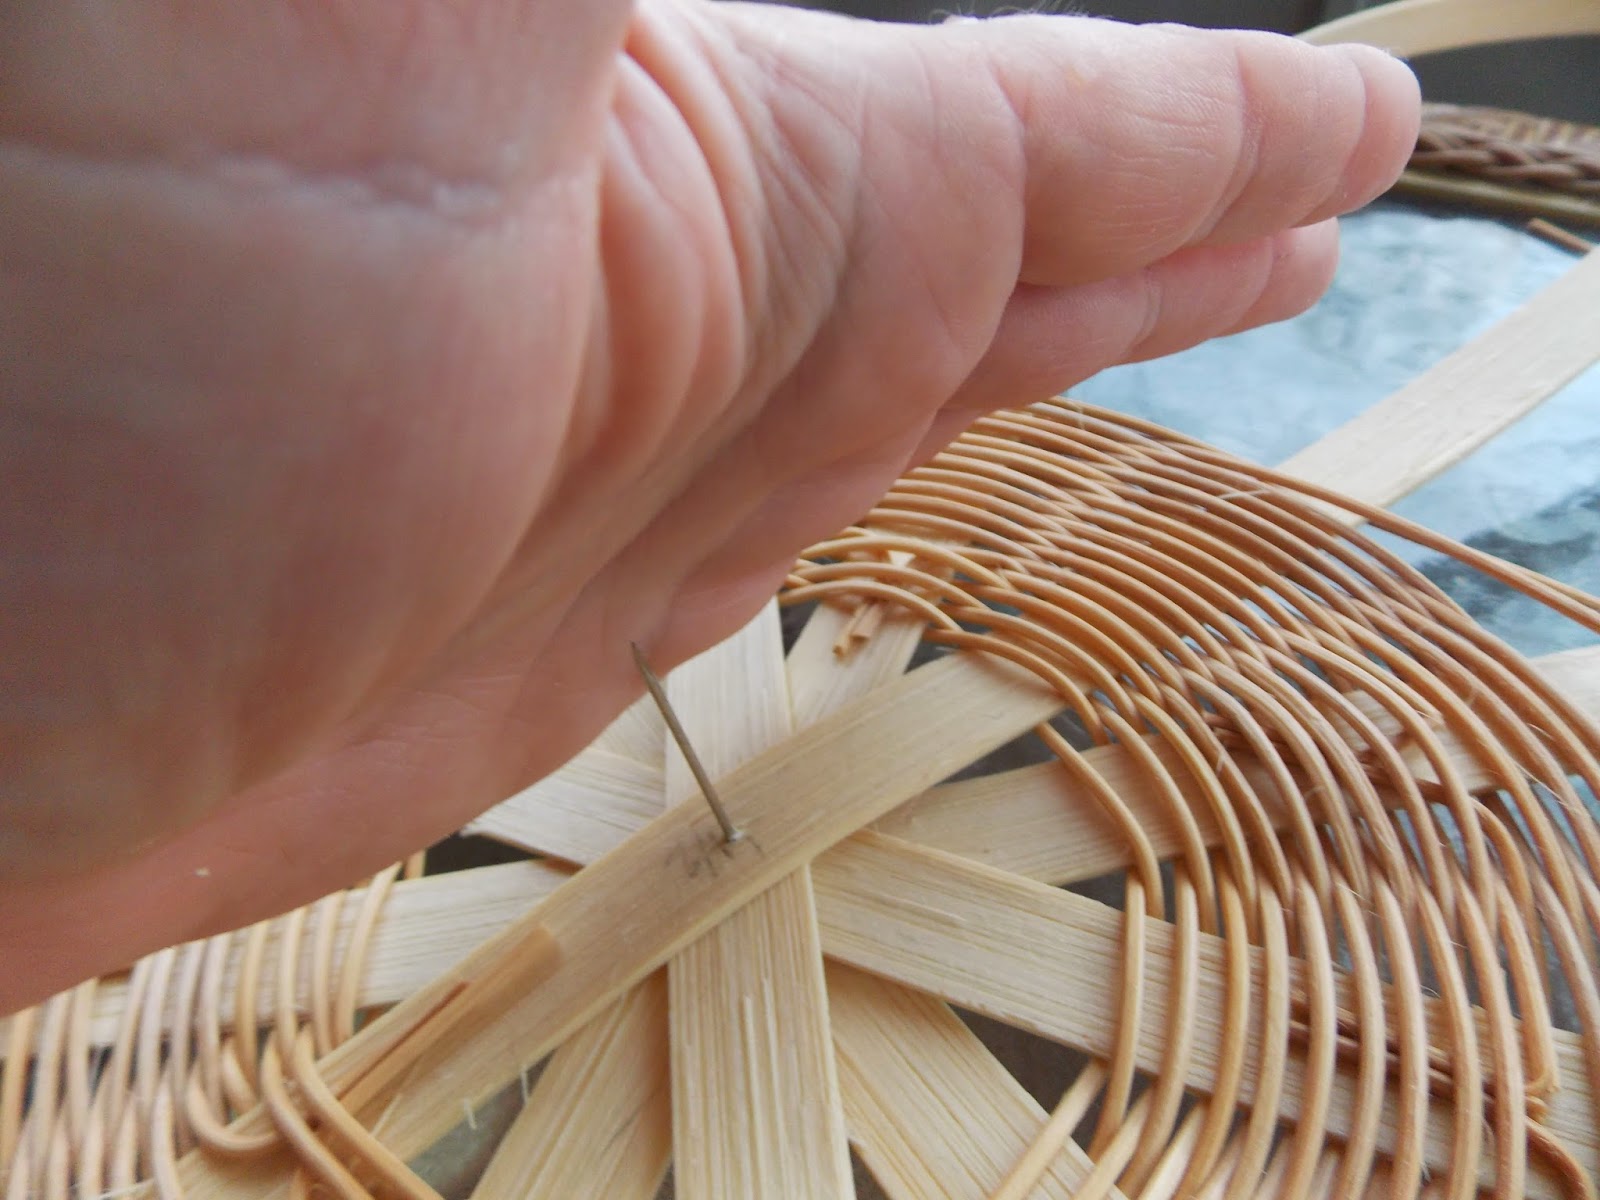
Measure, mark and cut your spokes. Make sure to mark the 1/2 point of the spokes as this is the point where you will poke your
T pin through to spiral the read around.
Soak your reed to make it pliable.
Press your T-pin on the right side so that the flat side lies flat on your work surface.
With the marked sides up, spear your weaving piece right where you've marked your centers on the wrong side (wrong side is up facing you). Once you have all your pieces laid out, adjust them so that they appear even to you. Place the child's plastic ball on the point end of the pin so that you do not constantly "pick" yourself (and your reed will constantly get stuck on it). Trust me, without it you will, I speak from experience.
Impale your eraser on top to save your hands.
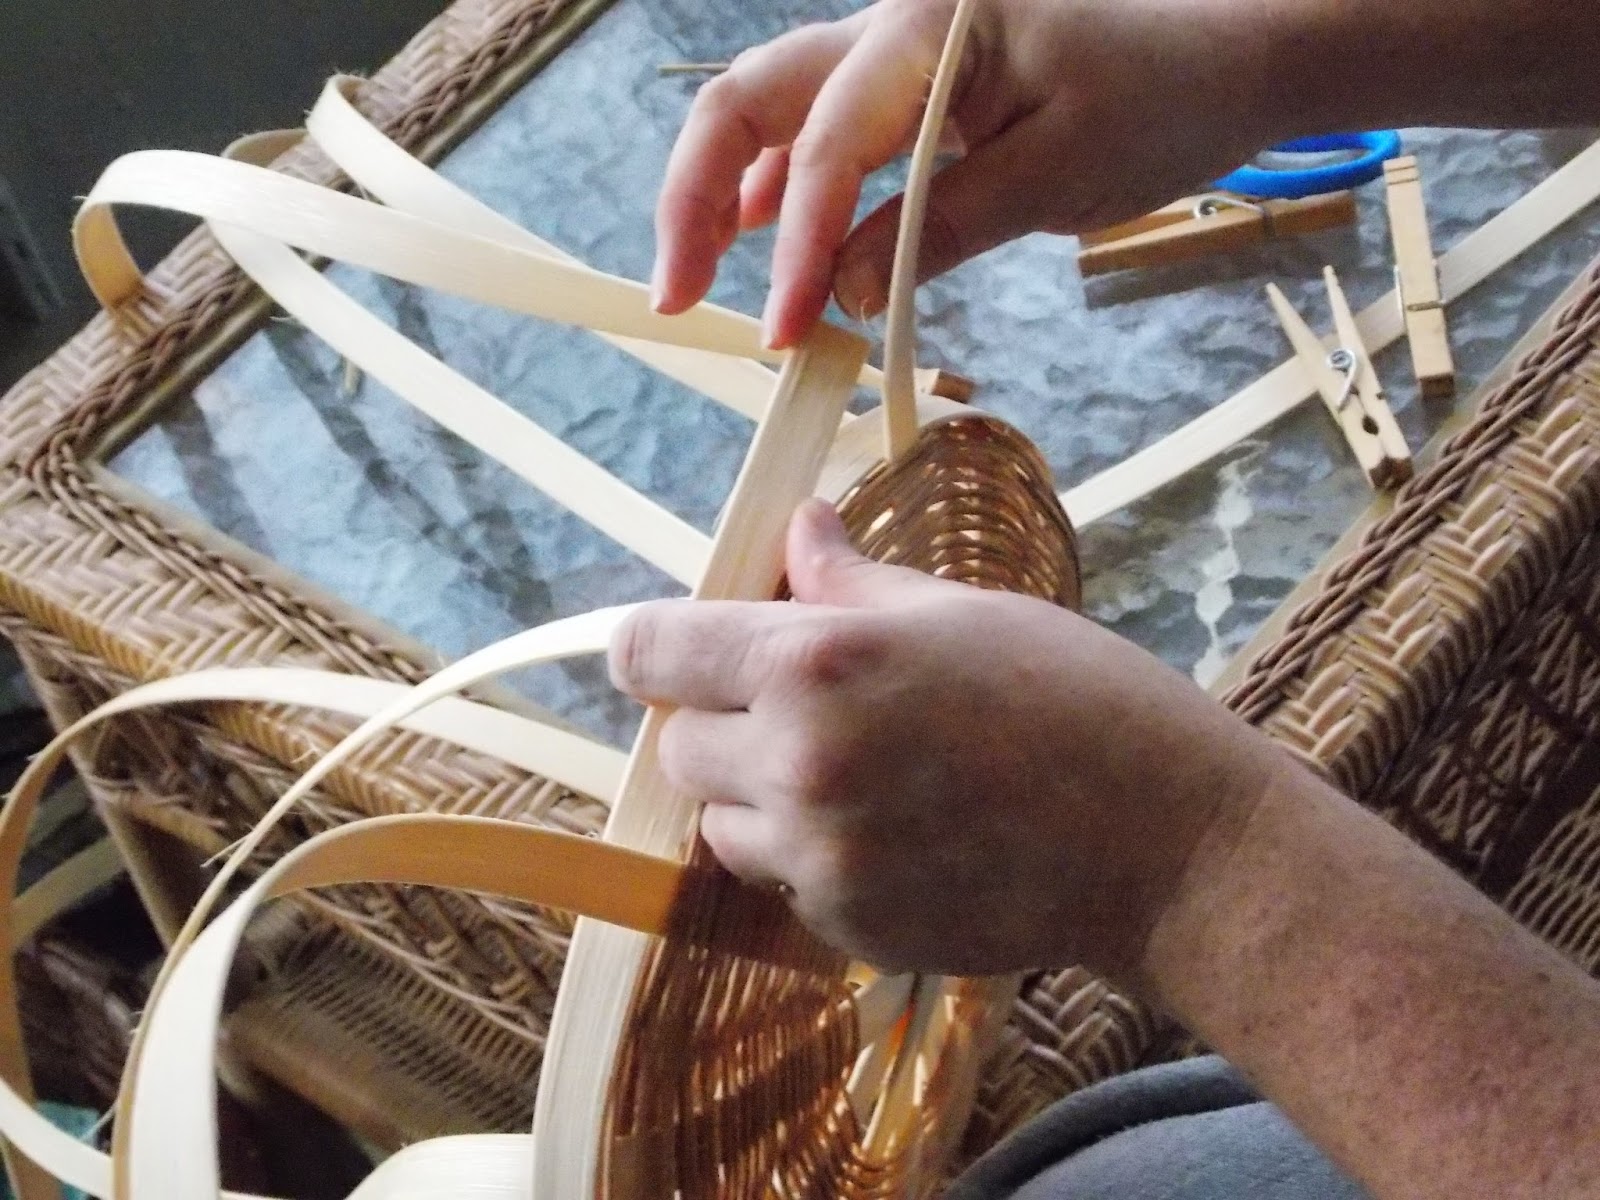
After soaking your round reed, gently bend off center and loop this around one of your bottom reeds to start weaving.
Try to keep your weaving in a nice circle as you weave your first row, adjusting as you go.

When you run out of reed, and you will,
gently bend the end and slide it in your last row of weaving.
Do the same with the replacement reed.
And continue weaving.
 Weave until you are happy with the size or until the basket fits your liner.
Now upset the sides of your basket. With the bottom (right side/outside side) of the weaving against your body, GENTLY bend your weaver away from you. You are now creating the sides of your basket. To corral them, you may want to clothespin several weavers together.
Begin weaving your reed and make sure you have lots of clothespin to hold your
weavers down as you build the basket sides.
 LOTS of Pins!!!
Starting at any spoke with a piece of reed that will completely go around the basket and around 4 spokes, weave around the circumference of the basket. When you get to the end, weave across 4 spokes to lock your work and cover up the beginning of the weaver. Continue up until you reach the height desired. You can add a liner in the form of any plastic bucket or in this case
Using your packing tool or a
flat head screw driver, push each row of weaving down, essentially
"packing" them tightly. Once you have done this, measure down two
rows of weaving (at least) and cut off the spoke with a slight angle. Slid this
spoke down on the inside of the basket, burying in under your last reed that
you measured to.
We are going to learn another
new technique, rimming your basket. Rimming is probably my least favorite part
of finishing the basket, but it is absolutely necessary to provide a sturdiness
and "finished" feel to your finished piece. Now, occasionally I'm
lazy as you see in the strawberry basket where there really is no rim but
honestly you really should do it. Here is the technique:
I'm rimming my basket with
1/2 inch flat oval. Because this is such a heavy reed, we have to soak it for a
long while to make it pliable. Once soaked, remove one of your pieces of reed
and, using your clothespins again, measure along the outside of your basket
overlapping by about 3 inches at least. Mark this overlap on the inside of the
reed and the outside of the reed like so:

Once you have marked the
reed, remove it from your basket and, using a paring knife, whittle away the
reed until, when you overlap the reed, it lays as flat as desired. Repeat this
exercise on the inside of the basket as well. Remove and soak.
 |
| The goal is to make the rim lay flat when it comes together. |
Taking a really long piece of
1/4 inch flat oval or flat/flat and your packing tool or flathead screwdriver,
open up a whole through the top of your twining to create a space to bring up your
flat oval.
Make a point on the end of your reed and feed it through this hole
with the flat side facing you and he oval side facing the basket.
Once up, take
your screwdriver or packing tool and open up another hole in the weaving
leaving at least two rows of twining to hold the reed you are feeding through.
Once down, feed it through the bottom of your weaving like so.
Repeat this process one more
time to assure you have a solid base from which to work.
Begin lashing by bringing up
your flat oval from the bottom rim up and around the inside rim feeding under
your last row of twinning. As you lash around the basket, continue to feed your
filler in between the two rims. Pull the reed tightly as you lash.

Once done, go back and, using
your packing tool, make sure you've lashed just as tightly as you can.

After your first rim around, using your packing tool or flat head screw driver, tighten your lashing by pulling the reed around to get any slack out of it.

Once you've gone all the way around the rim, you can decide whether you want to "x" the rim and go in the other direction or not. I did this for this basket. It's simply a design feature but it does make the rim that much more sturdy.
 |
| Cut off your reed filler. |
 |
| Feed it under the lashing. |
Once you have made your way all the way around the rim and have packed it, you have to the repeat the initial step but his time go "under" the rim filler. This isn't easy but you have to make sure that after all that work, it's secure.
End on the inside of the basket and cut it off.
Making sure your basket it very wet, take a cnacle or lighter and bun off any small hairs on the basket. Rinse off any soot.
Now decide how to finish your
piece. I decided to use a colored stain for the first time and actually wished
afterwards I had used a natural stain, the grey was a lot more opaque than I
expected. I stain outside to avoid the fumes. Let dry completely.
Once finished you can paint
or use rub on stencils for any large band parts of your basket.
The final step is sign and
date the bottom of your work and sit back and enjoy the fruit of your labor.
Wastepaper baskets are such an easy weave and yet very satisfying as you know
you will use this frequently and can make as many as you need. Make one for
every room if you want. Once you've made one, you can't help but want to make
another!
 Like many American homes, Friday night is often pizza night at our house. Growing up as a teenager, I remember making a few "Chef Boyardee" box pizza kits. They were fun, a bag of dried flour mix that became the crust, a can of sauce and maybe a small packet of grated Parmesan cheese. This was the making of home pizza when I was growing up.


