Places to Party

Wednesday, February 25, 2015

Birthday Taco Pizza

So last week we celebrated Dixmas, the birthday celebration of everything Dixon.

Like every birthday celebration, the celebrant gets to choose what cake and what meal.
Dixon chose chocolate cake with chocolate frosting and candy hearts I had in the cabinet. I put it on a pedestal and I think it turned out really nice looking.


For his meal he wanted something he has in school from time to time, something he calls, "Taco Pizza". I asked them how they make it. "Just like a regular pizza mom, but with taco meat and crushed tortilla chips.


On the night I was making it, I asked him what type of red sauce, "I don't know". So I put on my mom thinking cap and this is what I came up with. It wasn't half bad and judging from the fact that there was no more left, I think the guys agreed.


Taco Pizza  


  • Pizza crust rolled out and put on a cornmeal or bread-crumbed pizza pan or cookie sheet.
  • Enchilada sauce- a small can will do.
  • Mozzarella
Roll out the pizza dough and bake in a preheated 400 degree oven for about 12 minutes.
Remove.

Toppings:

1/2 lb of ground beef, turkey or chicken browned and seasoned with 1/2 package of taco seasoning with 1/2 the water

Spinach, tomatoes and taco cheese

Crushed tortilla shells (I used Tostitos)

Top your pizza with the above toppings. I used spinach because I figured it would hold up in the oven better. If you want to make a raw pizza,  you could bake it off with the cheese and put on the tomatoes and spinach at the back end.


Anyway, lower your oven temperature to 350 degrees and pop the pizza back in for about
ten minutes more. When you pull it out it will be like nachos and pizza had a baby. Yummy! I can see why the kid loves this dish. Not the most figure friendly but after a long week, definitely comforting!


Tuesday, February 17, 2015

You Have My Heart Quilt Project #2

The Luge Tunnel that we are currently calling a road.


It's cold. I mean like yesterday's -7 degrees with a -20 to -30 windchill.


Don't think it's doing much..do you?


My poor snow fence cannot keep up and I haven't seen my mailbox in about a week. The roads in our town look like a luge tunnel.


If the check is lost in the mail, I've got proof!


 We are so sick of winter.... 


The orphan blocks...


It's the perfect time for a project, quilt #2.


Years and years ago I saw this pattern in a quilt magazine, I don't even know which one, but I knew
I had to make it.


I carefully made the blocks, realizing that these were essentially strips, sewn together and then cut with corners of half blocks. I pieced several with the intension of eventually making a quilt out of what was presented as a simple wall hanging.


Showing the strip construction.


.......Then I ran out of steam.


So for years these lovely blocks have been ruffled, stuffed and lived a life of quite desperation in my fabric stash. Until now.

I searched through the stash and came up with five finished blocks.

"What can I do with five little blocks?"  I thought.

Well as you see, a lot.


Sometimes having less is really having more. I decided to feature these blocks instead of making an entire quilt out of them which, while it would have been lovely, would have also entailed a lot more time inputted than I really had time to spare. Utilizing the few blocks I had, really made them stand out in the quilt and I think, made them look all the more special.


So I decided to do a diagonal set which I've never done before. After setting this I really liked it but it also created a problem, namely, I got a lot of space to fill and not a lot of one color fabric. What to do?


So I thought about it on the commute to work. And making dinner. And working. Yeah, when I have problem, I can get a bit obsessive.....

And I came up with this. I found a pattern I really liked in Eleanor Burn's Pioneer book but I figured that if I did it in reverse, it may look more like filigree and less like a block. So here is what I made for the corners. 


This is how I made them. It's one of those patterns that is actually very easy but looks so much harder than it is. Look at the block construction, it's only two different blocks set at different angles: a diagonal piece and a wild goose chase block.


The diagonal piece is made by simply putting two squares and sewing on a diagonal . Then cut off the corner piece, bend it back and iron. I did mine in the opposite direction unfortunately but doing it three more times made it a pattern and not a mistake. I'm a big fan of mistakes.. I think some of the best things are made when something is done by accident. I'm a firm believer that brownies were developed when someone didn't add the right amount of flour to a recipe.

               ... and I love brownies.....


Then repeat on the other side.


I used Eleanor Burn's method for the Geese. She puts a smaller square on top of a larger square. I iron the crease so I don't have to draw the line and can center it.


Makes a line from one corner to the other on the diagonal and sews 1/4" from either side.


Cuts down the line, matches up the pieces on the outside of the piece, NOT THE SEAM, and repeats the process.


Then use the wild goose chase ruler to cut out.


Piece it together. Square it up with a 12x12 ruler as best you can.


Remember we are trying to use up fabric so I create this as I go. I wanted to use this cherry fabric for something else but I needed a lot of fabric for the side triangles. So I used it sandwiching it in as I went.


Then because I still didn't have enough of one fabric, I added boarders with a side cornerstone.


Out of a little, comes a lot!
Finally, last night I sewed all four corners together. I will probably add a border all the way around but for the most part we are calling this one done.


I think it came out pretty for some lonesome little blocks..what do you think?


Monday, February 9, 2015

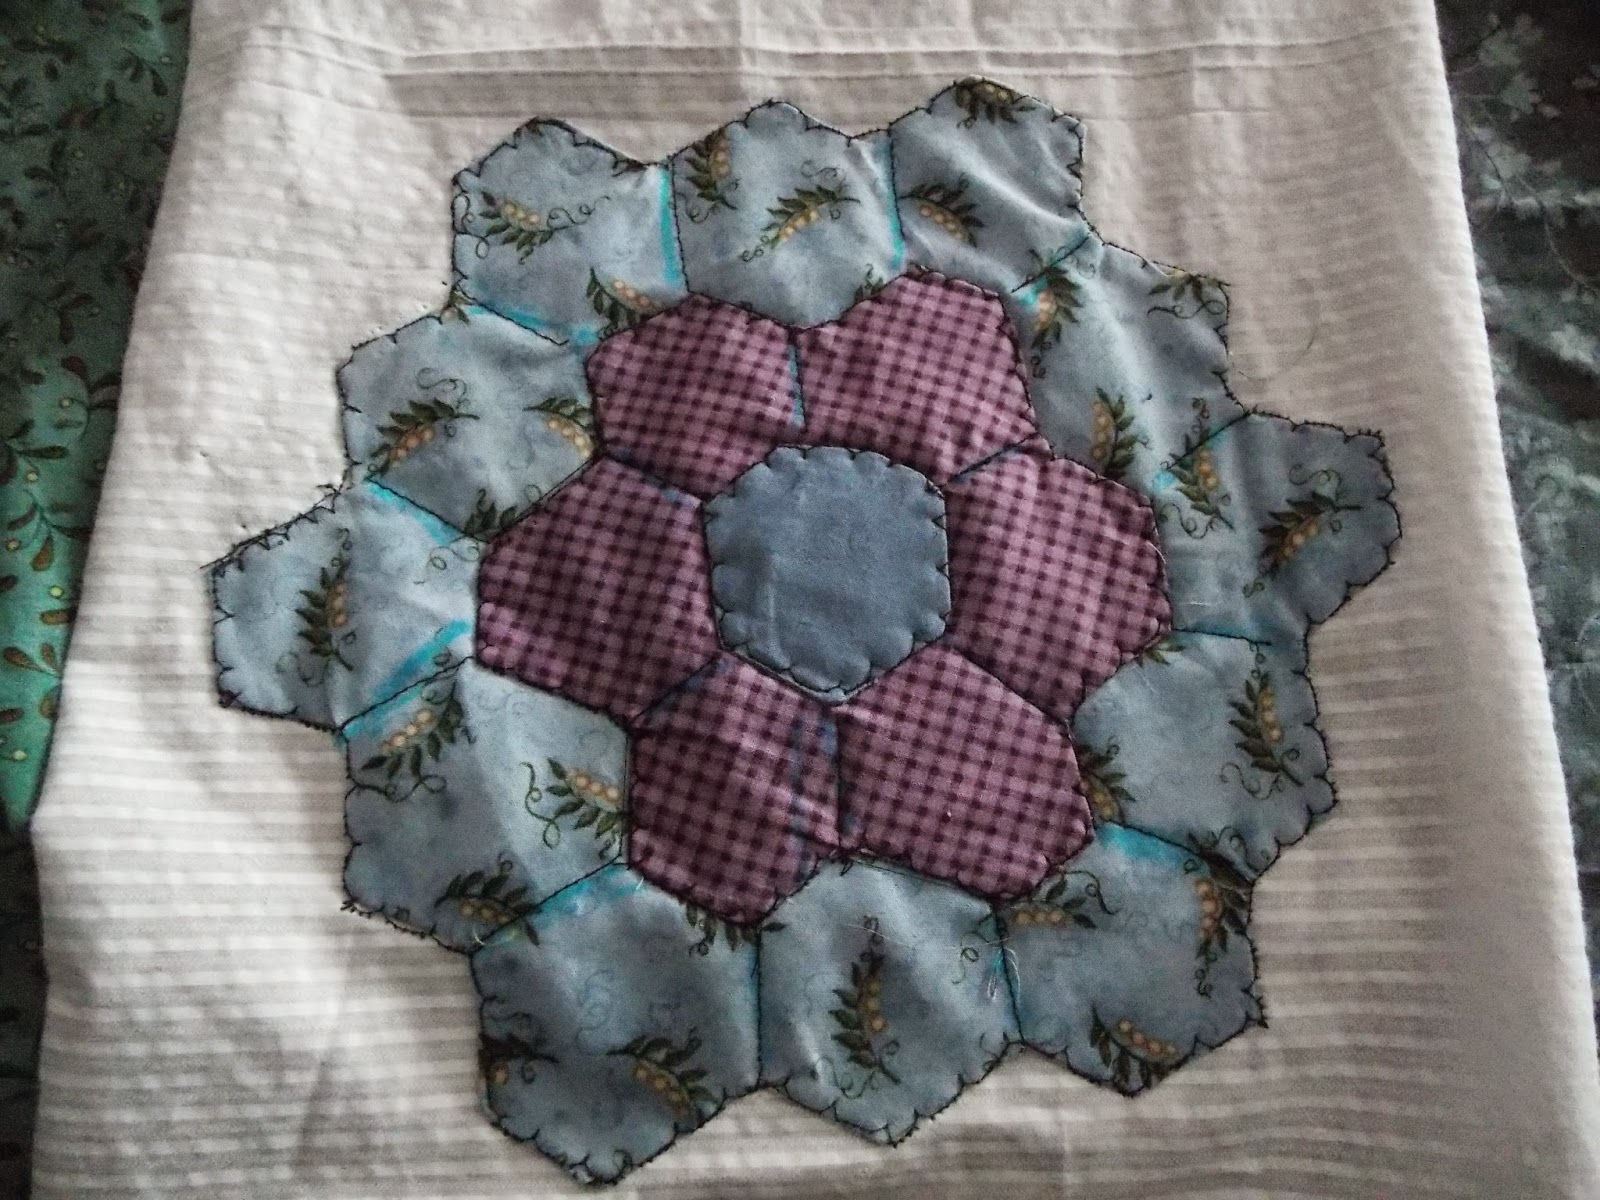
Meandering Through Grandma's Garden.. Project 1 is Done!


Oh Bed, Forgive me! Why did I Ever Leave You?


January's project is done. I do have to add a border and quilt it but the top part of the quilt is done.
 
Due to the cost of quilting, I typically wait until I have two quilt tops done to make the final quilt  that is reversible.


While I've always liked the Grandmother's Flower Garden pattern, what I do not like about them is the "busyness" of the final set. There is no place for your eye to rest. So I decided to add blocks of color that are found in the blocks between the blocks. Added bonus: it makes this quilt top that much faster to put together!

 
These are not the typical colors I use but I love that they have such a "freshness" about them. Especially in January when everything looks so grey and dreary outside.

 
What makes this quilt so nice and what I love about it is that you can use small bits of fabric to put together the blocks and they have such a dramatic effect. It's the little things you know....


Guess what? Project two is already in the works. More coming later....

Tuesday, February 3, 2015

Kisses for My Sweetheart

Fifteen years ago on Valentines I found myself in a hospital, very ill, about to deliver the best Valentine anyone could ever get, a bouncing baby boy. He was born at 2:54am the next morning so while others celebrate with candy hearts and chocolate, I have a growing boy to remind me that life is sometimes very sweet.

But for those of you that do celebrate Valentines (and not Dixmas as we celebrate on Feb. 15th, the celebration of everything Dixon), I have a nice little project that you can create and fill with Hershey's kisses to give to your valentine.

If you've made my strawberry basket, good news, you already have all the skills necessary to make this basket. This basket demonstrates how one little change can really change the entire feel of a basket. So lets begin.

Kisses for My Sweetheart Basket


12 spokes of 1/2 flat/flat cut at 24" & centers marked

#2 or #3 round reed (rr) not cut
1/4" Flat/oval dyed or natural or a little of both

Soak cut reed until pliable. Lay six reeds down side by side with centers lined up.


Weave three above and three spokes below the center line in and over and under pattern.

 
Use a scrap piece of 1/2" reed as a spacer to evenly space out the reed both horizontally and vertically.


You should now have a nice square shape.

 
Starting on the fourth spoke from any corner, start twining around your square with the round reed.


Weave until you reach the third spoke from the corner on the left and stop. Now, unweave that corner so that you have to spokes vertically together and two spokes horizontally together like so:


Now lift both spokes and you are going to treat this like it was your corner.
Showing weaving that corner.

Once you reach the second spoke, switch so that the horizontal spokes are now on top.
Weave those, keeping the center very close so you don't have a "gap". 


Keep tight to the center.
Like this.


Twine three rows of round reed.
 
 
This is what it looks like at this point.


Soak and upset. Pin with clothes pins as needed, especially on corners and center
portion of the heart.


Starting on top of a spoke on one of the long sides of the heart, start weaving in an over/under manner. Keep alternating sides so you don't develop a "bump" on one side of your basket. Keep your weaving as tight as possible next to the twining. Clothes pin each corner and turn together. It will take at least 3-4 rows before you no longer need clothes pins.


Remember to always overlap four spokes hiding behind the fourth spoke. 


Keep weaving until you are happy with the height. Add colored reed if  you like, or natural, or alternate or even cane. Make it your own! 


Use your hands to shape the basket as you weave it.
 
 
When you are happy with the height, take two pieces of very long round reed and starting on one of the long sides, twine three rows.


When you've completed three rows, ending at the beginning spokes cut them off.


Soak your basket well. Cut and tuck reed.

 
Your basket is now completed. Leave it natural or stain it.

 
Fill it with Hershey Kisses and give to your valentine.

 
When the holiday is over, use this as a candy dish. This would be equally adorable in a baby's room filled with cotton balls or in a little girls room hung on the wall.
 
Happy Valentine's Day!