Places to Party

Saturday, November 7, 2020

The Dollhouse-in-the-Field

 I have a new project.

Like I need a new project...

This project is dedicated to my two grandmothers and the house that my mother's family had built over a 100 years ago. 

My great grandmother's family, the Lee's had built this house in my home town about 150 years ago. While that part of the family was no longer living in that house when I was growing up, the house existed in that spot up until I moved to NY. That hill is still known in my local village by the older generation as "Lee's Hill". Unfortunately the house was torn down after I left. I don't know what the inside or the structure may have been to come to this decision and I do know that where the house was situated was very dangerous as the driveway was on the downside of the crest of the hill, so pulling out of that driveway was treacherous. Still it makes me sad.  My dollhouse looks nothing like the white farmhouse of my relatives but it is dedicated to that house in spirit.


My maternal great grandmother Jessie grew up in that house with her brothers and sisters. She grew up in teens and married in 1924 for about two years. That marriage dissolved and she raised my grandfather by herself from 1925 until he left home for the army. She got all of $5 in child support for him! Can you imagine being a single mother in the 1920's/30's? She deserves to be honored for that.


My paternal grandmother went by Jenny as she hated her given name. She was the grandmother that doted attention on my brother and myself as we were her only grandchildren. She was an avid seamstress and I credit her with my love of all things crafty. She was born in 1922 and as my little Kewpie-like doll is about five years old, I set the year of the dollhouse in 1927 after my grandmother.


 On one lunch hour I was googling random things and I thought, I wonder if anyone did an Arts and Crafts dollhouse and sure enough someone had! I love the Arts and Crafts movement and wanted to do a 1920's style house that was done up in that style. 


 As synchronicity will happen, after about two weeks I found a person locally on a Facebook buy and sell page that was selling this Bentley Hill dollhouse for $30! It wasn't perfect and was missing some parts but this is an expensive dollhouse any day of the week and I don't have that kind of expense account so I snapped it up. It barely fit in my car.


The dollhouse was probably 80% done. They didn't do many of the shingles and they weren't included so my shingles aren't the same as what was initally started. The house was a horrible yellow and green color scheme that I repainted quickly. My paint was a paint sample I got from a local big box diy store. I highly suggest doing that, it cost me maybe $3 and it's quality house paint. I added the shingles, a door, painted the entire exterial of the house and added a mailbox and porch swing, because, doesn't every farmhouse need a porch swing?


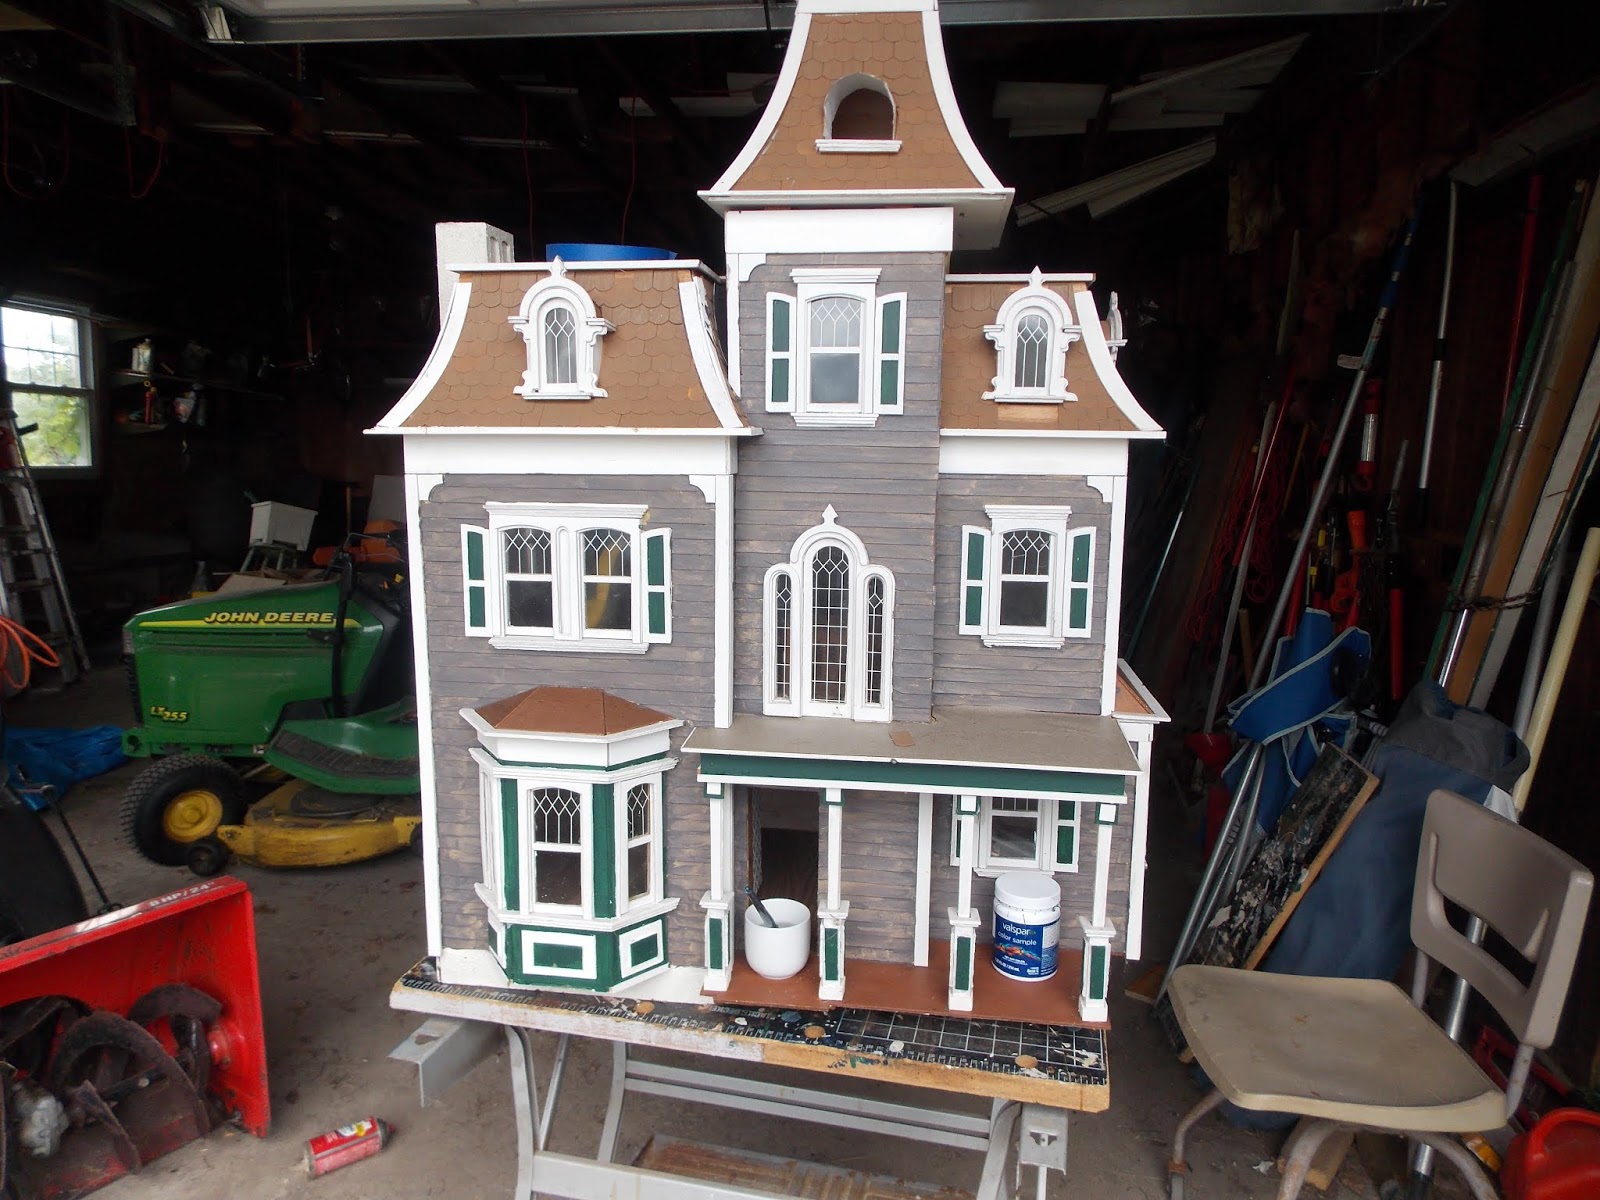
That is the front of the dollhouse. Next post I'll show you the first room that I finished. The sewing room. Stay tuned!

Wednesday, May 20, 2020

Glassing up the Old Farmhouse

One good thing about being at home so much while we are all sheltering in place (SIP) is that there are so many things that have gone to the wayside for YEARS that I can now focus on. One of these things has been the outside of my house.

We spend so much of the year inside and when the warm weather starts, I'm using spending most of my day at work plus a two hour commute each day so by the time I get home, make dinner, it's already almost 8 or 9pm and I'm not about to start anything.
Being home all the time now, I actually have some time to do things that have just been designated not that important to focus on that, none the less, still make the old farmhouse look so much nicer.

I've been desperately cleaning the area around the house of the 20+ years of bramble, poision ivy, old trees and noticed for the first time just how many birds we seem to have this year. Have you noticed? I've seen at least four or five bird nest in random places and there is a wonderful little Oriole in my cherry tree that sings all day long. She/he's made a nest right in the crook of the tree.


So in an effort to supporting my feathered friends, I have been making all sorts of lovely things for them and consequently, my mother's birds just from what I have around the house.

First was this feeder that was based on a design my sister in law sent me. Her design was made of string and beads, and while lovely, would not last the winter or the summer. The design was interesting so I played on it and made this.

This became my mother's gift for Mothers day. I love it when my mom likes something I've made!


The herb garden has been put in as well as one of the flower gardens but I'm still working my way around the house.


It is BAD believe me! 20 years of neglect does that. I guess I shouldn't call it neglect, one only has so many hours of the day and w/o being home so much you can only do so much. It's looking better though..


I found an old birdhouse gourd in the garage and cut a hole, planted the seeds in old worn out wheelbarrow at the top picture, painted it and hung that up. I also have an idea about making some birdhouses out of basketweaving supplies so hopefully you should see that soon.


Wednesday, April 22, 2020

Glass Tulips!

How our world as changed since my last post!

I've been working from home for about a month now. I find it funny how much I miss going to the office. I've seen good behavior and really pitful behavior that makes me ashamed of people. I feel for the nurses and all those who work with the public, many of who don't make a lot of money and are forced to expose themselves to both the possibility of catching this virus and the misguided wrath of a frustrated public.

But, like everything one has to find a positive in the situation. Remember all those projects you keep telling yourself you'll get done "someday". Guess what... someday arrived. I've taken advantage of the little extra time (when not cooking and cleaning everyday) to make a list and check off all these nagging little tasks that I don't think of until I'm right on top of them.

Attic Before


So far I've tackled my entire attic and got that straightened and believe me it was bad.


Attic after


I've cleaned up the house and am next tackling the linen closet and the addition closet that has never been cleaned since we bought the house and probably has items from the previous owners.


And there have been the projects. I've started my tomato and tomatillos seeds three times as between the new cat and the family running laundry I've had two trays dashed to the floor now.

I decided to try to tackle a stained glass lamp. I have a pattern book that is relatively beginner friendly as you simply make for panels and then tack them to a lamp cap.


Unforuntunely, being my first lamp, I had no clue that the lamp cap only comes in one size and when I enlarged the pattern to what it indicated in the book, it looks like it is too big by quite a ways. I'll have to figure out something...


I got one side done last night. I need to work on my soldiering technique, but I'm satisfied with the results.


For now I have to put away the stained glass and start on my niece's wedding quilt. Also have this beauty to start work on while we're at home. Also working on a rag rug quilt and trying to put together a better format on my Youtube video to show how to make it.


What projects are you working on?

Saturday, December 7, 2019

BOM: FINAL BLOCK!!! Candycanes for the Kids!


Can you believe we are on our final block? Wow, a year seems to have passed within a blink of an eye.

If you read the last post, you now should have all the half square triangles (HST) and then some that you need for this block. This block is REALLY easy to piece and a nice one to finish on.

I mean, if there was any type of "sewing torture" that would be it. Sewing on the bias is horrible. They rarely come in right, you have to do lots of trimming and, at least for me, they always end up wonky.

Which is not my intent.

We are going to start with our pile of freshly pressed HST's. and go from there. This block is really quick after we have those. We simply need to cut about three more pieces. A large rectangle and two small squares.


When we put them together they start to look like our candy cane!


Cool.


Take three of your HST and add one of your rectangles as shown. Sew the three HST together to form one piece and sew this to the rectangle set with the shortside to the top to run parallel to the now pieced three HST. This creates the bottom unit of our candy cane.


For the top, we do have to snowball one corner. Taking one HST situate it so that the "stripe" portion is facing in the lower left hand side. Mark one background piece on the diagnal and place it on your pieced HST.


Sew directly on the marked line. Cut off the area above the diagonal line and press.


Creating this:


Now position that with two more HST to form the stripes and the top row. Then add two more HST with a background square in the middle and your top portion of the candy cane is all set!


I do love how fast this block comes together!


Add your finished top portion to your finished bottom portion.


Ta da! Your block is finished.


Make four more and you have all you need for the quilt top.


In my next post we can start putting the top together and see how a year of work has turned out...


Now, on a completely unrelated note...


How cool is this? I pulled out this Aunt Lydia's sewing thread. This had to be from my husband's aunt's collection I inherited. I went to use it but it was really too thick to go thorough my machine. Too bad though because it matched really well..

Fun stuff you find when you inherit other women's sewing items. I think it's nice to use them. It honors the person that originally had the sewing kit as her items aren't just being tossed in the trash but goes forward to make something useful or beautiful or both.


Thursday, November 21, 2019

Half Square Triangle Technique


This blogpost started as a tuitorial for the last block the more I tried to explain how I made it, the more it became apparent that the focus was more on the technique. Here is how to make a boatload of half square triangles (HST) in one setting.

This technique is found in my first quilting book I ever bought - a veritable quilt bible, Quilts! Quilts! Quilts!. They had an awesome way to do a huge amount of blocks in one setting. Also, because these blocks are done all at once with a whole cloth, you don't have the inevitable stretching of these individual blocks because they are all sewn on the bias. This is the original technique that eventually lead someone to make the half square triangle paper sold by Fat Quarter Shop. If I was doing hundreds of these squares like a future "Tree of Life" block, I would simply purchase that paper (and have), but with five little candy canes and something like 21 blocks, I'll use this technique instead.

1. First determine your final block measurement and add 1/2" measurement to that.

For example, if you needed your square to finish at 1 1/2, you would add the 1/2 measurement to get a final measurement of 2"(1/2 brings us to 2").


The double line at the top was a mistake.


This will be your grid size. On the back of your light fabric mark this grid. Your grid can be two or three across by whatever height you determine. Once the fabric is marked, place your two fabrics that will make up your half square triangles together, right sides facing with the marked grided fabric facing up.


2. Once the grid is marked, mark through your grid corner to corner across all three squares where indicated. Some grids that are in the corner will only have one mark, some will have it going through all three diagonal squares as shown. Then mark in the other direction. You are creating big squares set on point. Hopefully this picture will make it more clear:


3. Pin the fabrics together making sure to avoid the diagonal lines. Use LOTS of pins!

4. Sew 1/4" on either side of the diagonal lines but DO NOT sew near or on the straight lines in either direction.


5.  Sew on one side of the diagonal line pivoting when we come to a corner and sew down the other side. Do this all the way around. This is why we make it 1/2" larger, it will be taken up by the 1/4" each line.


6. When completely sewn, it should look like this:


7. Cut all the outside borders and then cut on all the straight lines, then the diagonals.


8. Separate each half square triangle and press it. Measure the final size of the HST and if it needs any trimming do so, as you will have "dogears" to trim. You now have a ton of finished HST to use in whatever block you are building.


Thursday, November 14, 2019

Sewing Room Helpers Part 2


Oh my! My life is in pieces....
...whatever should I do???


When we last left you, our heroin Pretty Polly, her skirt was being filled and she just felt like her life was in pieces! 


(Dramatic pause, I've been listening to a lot of old radio programs lately).


When the skirt is filled, gather the top with the gathering thread and make sure it's pulled tightly enough to form a small "cone" at the top that will fit inside your half doll. Thread your gathering thread into a needle and use this to sew the top portion of the skirt into a tight "cone".


Tie a little gathered knot.


With a new piece of thread, run the first stitch through the skirt portion.
Thread it through one of the holes in your half doll. At this point, I also
put a little bit of Crazy glue inside to hold the doll securely.


Sew from front to back through all the holes. This doll had three. Sew several times until you feel the base is secure to the skirt portion.


Tie a square knot or slip it under your stitching and double knot it.


Here is our pretty lady all completed.


From the back.


Joining her new sister.


I do think this one will be my cross stitch companion. She's small enough to fit in my work caddy for my needlework and will be perfect for errant needles.

Hope you enjoyed this blogpost. Please leave a comment below on what you are working on.